| Returning to the cowl plug: Since it
is quite large with many reverse curves and protrusions, it will be necessary
to make the final mold in six pieces to ensure that the cowl can easily be removed
from the mold. Here weather stripping tape is applied to make a parting barrier
for the first section of the mold. |
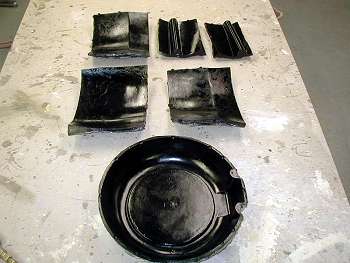
Here’s the casting of the front ring
of the cowl. There are a few holes caused by air bubbles that will have to be
filled.
I guess I didn’t vibrate the plaster long enough or else
it was too thick/thin? I need a little more practice.
|  |
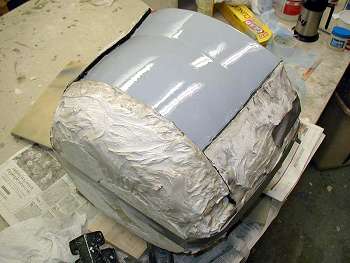
| This shows the preparation for the final
piece of the mold. So far, so good. |
All six pieces of the mold, filled, sanded,
and painted with black gloss paint.
|  |

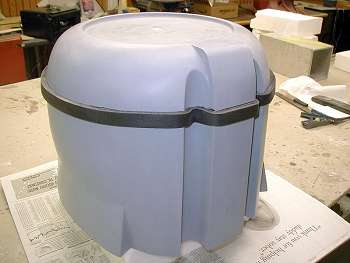
| The mold is fully assembled. Now I will
apply 5 coats of mold release wax and then follow that with a coat of PVA mold
release prior to starting lay up of the fiber glass. |
Working away at laying up the fiber glass.
Gel coat is applied to all the corners and sharp edges. First layer is a 1.4 oz.
cloth. Then 2 layers of 8.7 oz cloth and one layer of 6 oz. cloth. It requires
15 strips of cloth 5” wide by 16” long for each layer or about .7 square
yards per layer. I wait about an hour between layers for the epoxy to get tacky.
That makes it easier to lay in the cloth before applying more epoxy. It took about
six hours to lay up the entire cowl.
|  |

| The cowl has been pulled out of the
mold. It looks pretty good. Needs a bit of touch up work, but all the corners
are sharp and well defined, so I am quite satisfied with the result. Further inspections
reveals a lot of small air bubbles trapped between the first and second layer.
I will have to learn to pay more attention to getting the second layer down with
out bubbles. I will have to grind out and expose the holes caused by the bubbles
and fill with Bondo for finishing. |
Here’s my ugly mug to show the size
of this cowl. This is the first time I have made a mold in this manner and considering
the complexity of the shape, I’m really happy with the result. At least if
I have an unfortunate accident with the plane in the future, I will be able to
reconstruct the cowl with relative ease.
| |

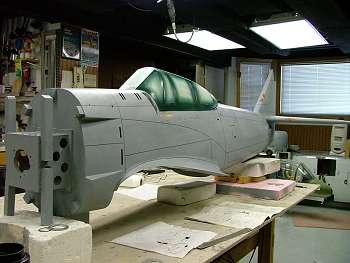
| With the cowl sanded and primed, the
frame is starting to look like an airplane. Now progress begins to slow down as
all the details have to be completed. I will finish the wing fillets and then
everything is ready for priming. It’s nice to have the construction completed
but it will take just as long or longer to finish it out. That radial really looks
sweet inside the cowl. Can’t wait to fire it up and listen to the sound. |
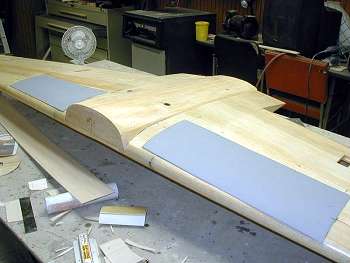
Now that
the holidays, etc are behind us, I have managed to get back to work on the KI-100.
Here are the fiber glass layups for the wheel pants and retract covers. I laid
them up on the wing before cutting out the openings for the gear. After I install
the gear, I will cut out the pants and covers.
|  |
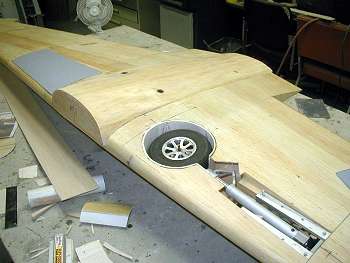
| Here the cutouts for the gear have been made and the lining
for the wheels wells has been installed.
|
Now it is time to sand out the epoxy. I use a random
orbital sander with 100 grit paper. It is hooked up to my shop vacuum, so there
is a minimum of dust from the resin. After sanding I will roll on two coats of
Sherwin Williams Ultra-fill primer and then sand that off with the sander and
220 paper.
|  |
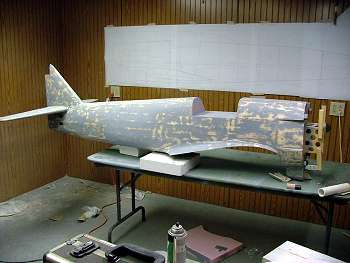
| Here are the results of the sanding after
the primer was rolled on.
Now I will spray on a heavy coat of primer
and then wet sand with 400 paper
|
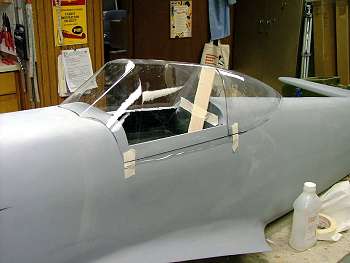
| The fuse has been wet sanded and is now ready for the
cockpit area to be finished.
Here the canopy is cut and fitted prior
to gluing it on with Formula 560 canopy glue.
|  |
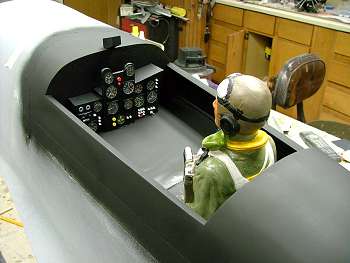
| The instrument panel and pilot have been completed and
glued in after spraying the entire area with flat black paint. |
Here the canopy has been positioned and taped to the fuse.
Then Formula 560 is applied to glue it down. Next I will apply evercoat to all
the exposed edges and sand the canopy edges into the fuse. |  |
| The canopy has been taped and the framework has been painted
on. The panel lines have been added to the fuse. Next I will add all the rivet
details and then it will be time to begin painting.
|
| The last thing to do before I start painting is to make
the baffles for engine cooling. Since this radial requires special attention when
installed within a cowl, I have constructed an aluminum baffle plate that surrounds
each cylinder head. I will install a foam ring inside the cowl that will butt
up to the outer edges of the baffles to prevent air from flowing anywhere but
through the cylinder head cooling fins. Hopefully this coupled with the large
exit area provided by the cowl cooling flaps will prevent any over heating problems.
| |
BACK to PROJECTS
|
|
Become an RCWarbrids site supporter by making a donation.
|
$5.00 |
 |
$10.00 |
|
$15.00 |
|
$20.00 |
|
| |
|
|
|
|


